Online training courses have been growing in popularity for years, but they have really taken off since the coronavirus pandemic sent the world into lockdown.
Many authors teach as part of their business models, and I’ve been creating and selling my own online courses for the last decade, as well as being an affiliate for others. In this article, I explain why you should create an online course and the basic steps to creating one. You can find more detail in my course: Turn What You Know Into An Online Course.

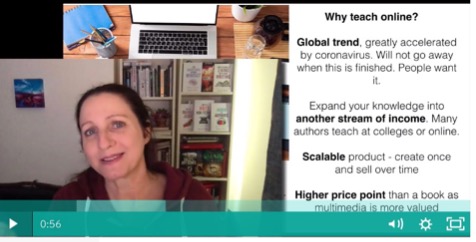
Why create an online course?
- You already teach in-person events and want to take them online
- You want to share your knowledge with students around the world and help others with your expertise
- You want to increase your revenue with a scalable product (i.e. you create it once and sell it over and over again)
- You want to turn your book into a higher value product as people will pay more for multimedia material
- You’d like to develop skills that can bring you income from sales but also help you with book marketing (e.g. video and audio production)
If you’d like to create your own profitable online course, here’s an overview of the process.
(1) Change your mindset
Too many authors put up barriers to course creation. I hear the following all the time:
- “I just want to make money from books. I don’t think full-time authors should have to teach.”
- “It’s too technical. I don’t know how to use the tools.”
- “It will take time away from my writing.”
- “I don’t want to have to sell or market the course.”
If you want to make money online and monetize your skills, you’re going to have to get over these issues!
Most authors have other forms of income, and a great number of them teach — either in colleges, universities and schools, or as part of writing courses, literary festivals, summits, and seminars. Turning that live event into an online course is not a huge step and you can easily learn the tools. Once you know how to use basic video and audio software, you will find yourself using those skills for book marketing as well.
Yes, it might take some time away from writing in the short-term, but once the course is set up (providing it is evergreen), it can keep selling while you work on the next book.
And yes, you are going to have to market and sell the course — but you need to do that for your books as well. Such is the author life these days!

(2) Decide on the topic and type of your course
There are a number of ways to decide on the topic for your course:
- You have a book already and you want to present that material in a new way, or you have a blog and want to serve the needs of your existing audience.
- Do a survey of your audience and ask them what their biggest question is around your area of expertise. This will give you a lot of material you can use within the course as well.
- Research what people are looking for in specific niches. Look at the top 100 books on Amazon in sub-categories, or magazines on the topic. Look at the top questions on Quora and/or questions on Twitter around a topic or the number of Facebook or LinkedIn groups on an area. If you ‘listen’ by checking these types of sources, you’ll find a myriad of ideas.
If you want a profitable course, it needs to be specific and address a painful problem that people will pay money to solve. It also needs to be aimed at an existing audience that is big enough to provide the return you want from your investment. Hopefully, you will already have an audience, but if not, it’s time to build one!
[Here’s my tutorial on how to build an author website and set up your email list.]
You also need to decide on the type of course, for example, will it be a series of short downloadable lectures available at lower prices? Or a mega-everything course at a premium price with lots of personal contact and support? These are different offerings with different price points and suit different types of creators. You get to decide.
(3) Plan the content and prep your material
This takes a while because you need to consider what you will include in your course.
- Start by brainstorming all the possibilities. If you have a book already, it can be based on your table of contents. If you’re a speaker, you might have a presentation deck to start with. I often plan in Scrivener or in Keynote and create a skeleton of the main modules.
- Flesh out the modules into smaller bite-size chunks that will be turned into separate videos within the sections. Remember that a training course is a journey as much as reading a book is, so make sure you organize it all in a logical sequence.
- Go multi-media. Use core video and audio, but also consider PDF downloads, worksheets, workbooks, exercises and other aspects that will bring the material alive. You can also plan bonus videos with experts in your niche, as well as live webinars with participants and even a community, e.g. I have Facebook groups for some of my courses. Some courses include homework and other 1:1 help, but that adds a lot of ongoing work so be clear what commitment you will make.
- Decide on your price point at this stage because this will guide how extensive the course is. For example, a mega-module course on how to run Forex trading from your laptop will be a lot more expensive than a series of small courses on how to play specific songs on a guitar. They both have their audience and separate price points. Don’t spend many months creating the mother of all courses which will cost thousands and only sell to a few. Keep the course small, especially with your first endeavor as chances are you will learn along the way and do it differently next time.
By the end of this prep phase, I will have Keynote decks for each of my videos as well as the logos and images needed throughout. Basically, everything is in place for recording.

(4) Get over the tech hurdle and learn how to use the (basic) tools
You will need to use some technology in order to create your course and you will get better with practice. There is a learning curve with any new skill, but good news, it’s a lot easier than it used to be!
Start with whatever you already have, for example, most computers come with some form of basic video and audio software, plus you can use your phone if necessary. Don’t over-invest until you are sure what you need.
There are lots of options but currently, my tech setup is as follows:
- Blue Yeti USB microphone for high-quality audio
- Screenflow on Mac for video recording and screen capture as well as editing (or use Camtasia for PC)
- Skype and eCamm Recorder for recording bonus interviews
- Amadeus Pro for editing audio (or you can use free software Audacity)
- Keynote for slides (or use Powerpoint on PC)
Teachable for hosting, selling and managing the course which means I don’t have to maintain my own separate site with plugins and payment systems. I’ve done my own tech setup before and it is a huge pain, whereas with Teachable you pay a scalable monthly amount and they do all the tech maintenance. It’s basically drag and drop your finished files. Super simple!
- PayPal for receiving income, and you can also use Stripe. Get this set up early and start transactions through it as there are checks in place for anti-money-laundering that will put a cap on what you can transact otherwise.
(5) Record and edit your content
Once your material is prepared, you need to record and edit it. This might be quicker than all the preparation steps above.
- Plan specific blocks of time for recording. Doing video is a little like a performance in that you have to project energy into your presentation so it can be tiring for introverts (like me!) So I set aside time in the morning for recording video.
- Plan longer than you need. If you have material that you think will add up to 30 min of video, then plan for 90 minutes to record it. You will stop and start as you go through and you may find things you want to add. You’ll have false starts and generally, it will take longer than you expect. This is true for most creative work!
- Edit in separate sessions. I find it easier to record several videos with all the mistakes and then go back later to edit them.
- Keep everything organized and backed up. Make sure you have an organized system for your files. For example, separate folders for the slides, raw video, edited video, audio, exercises, bonus interviews etc. Make sure you also back up the material just in case.
(6) Prepare your sales page and marketing plan
We all know that you can write the best book in the world, but if no one knows about it, then it won’t sell many copies. The same applies to courses!
- Build a sales page so people know what is in the course. This is like your book sales page on the retailers and there are specific things you need to attract buyers. You can always use some of mine as examples: www.TheCreativePenn.com/learn
- Tell your audience about the course. If you have a website or email list or platform in any way, then you can start by telling those who know you about the course.
- Go wider. All the usual principles of marketing apply when you are selling a course, just as when you’re selling a book. You can do content marketing – blog posts, podcast interviews, social media sharing and you can also use paid advertising e.g. Facebook Ads, to attract your target market. More marketing ideas here.
- Work with affiliates. If you have a network of professionals with your niche, you can work with them to cross-promote your course. If you do this, it is best to offer some kind of affiliate relationship, which is basically a percentage of the sale. I have affiliate relationships with a number of people I trust who have courses I have taken and recommend personally. Examples here: www.TheCreativePenn.com/courses
(7) Open the doors!
It’s time to launch and start letting people into your course!
If you’ve done your job right and created something of real value, your customers will love your course and find it useful and will be more than happy to pay for that education. This is not about merely re-packaging a book, it is about offering extreme amounts of value for a reasonable price that will hopefully change people’s lives in some way.
So what are you waiting for? Go create your own online course.
Any questions? Please leave them in the comments and join the conversation.
For more detail on the step by step process, check out Turn What You Know Into An Online Course.
Watch my video with more detail below or here on YouTube.
Check out the course by clicking the image below.
Go to Source
Author: Joanna Penn


